Run linting checks with SQLFluff
By linting your project during CI, you can ensure that code styling standards are consistently enforced, without spending human time nitpicking comma placement.
The steps below create an action/pipeline which uses SQLFluff to scan your code and look for linting errors. If you don't already have SQLFluff rules defined, check out our recommended config file.
1. Create a YAML file to define your pipeline
The YAML files defined below are what tell your code hosting platform the steps to run. In this setup, you’re telling the platform to run a SQLFluff lint job every time a commit is pushed.
- GitHub
- GitLab
- Bitbucket
GitHub Actions are defined in the .github/workflows directory. To define the job for your action, add a new file named lint_on_push.yml under the workflows folder. Your final folder structure will look like this:
my_awesome_project
├── .github
│   ├── workflows
│   │   └── lint_on_push.yml
Key pieces:
on:defines when the pipeline is run. This workflow will run whenever code is pushed to any branch exceptmain. For other trigger options, check out GitHub’s docs.runs-on: ubuntu-latest- this defines the operating system we’re using to run the jobuses:- When the Ubuntu server is created, it is completely empty.checkoutandsetup-pythonare public GitHub Actions which enable the server to access the code in your repo, and set up Python correctly.run:- these steps are run at the command line, as though you typed them at a prompt yourself. This will install sqlfluff and lint the project. Be sure to set the correct--dialectfor your project.
For a full breakdown of the properties in a workflow file, see Understanding the workflow file on GitHub's website.
name: lint dbt project on push

on:
  push:
    branches-ignore:
      - 'main'

jobs:
  # this job runs SQLFluff with a specific set of rules
  # note the dialect is set to Snowflake, so make that specific to your setup
  # details on linter rules: https://docs.sqlfluff.com/en/stable/rules.html
  lint_project:
    name: Run SQLFluff linter
    runs-on: ubuntu-latest

    steps:
      - uses: "actions/checkout@v3"
      - uses: "actions/setup-python@v4"
        with:
          python-version: "3.9"
      - name: Install SQLFluff
        run: "pip install sqlfluff"
      - name: Lint project
        run: "sqlfluff lint models --dialect snowflake"
Create a .gitlab-ci.yml file in your root directory to define the triggers for when to execute the script below. You’ll put the code below into this file.
my_awesome_project
├── dbt_project.yml
├── .gitlab-ci.yml
Key pieces:
image: python:3.9- this defines the virtual image we’re using to run the jobrules:- defines when the pipeline is run. This workflow will run whenever code is pushed to any branch exceptmain. For other rules, refer to GitLab’s documentation.script:- this is how we’re telling the GitLab runner to execute the Python script we defined above.
image: python:3.9

stages:
  - pre-build

# this job runs SQLFluff with a specific set of rules
# note the dialect is set to Snowflake, so make that specific to your setup
# details on linter rules: https://docs.sqlfluff.com/en/stable/rules.html
lint-project:
  stage: pre-build
  rules:
    - if: $CI_PIPELINE_SOURCE == "push" && $CI_COMMIT_BRANCH != 'main'
  script:
    - pip install sqlfluff
    - sqlfluff lint models --dialect snowflake
Create a bitbucket-pipelines.yml file in your root directory to define the triggers for when to execute the script below. You’ll put the code below into this file.
my_awesome_project
├── bitbucket-pipelines.yml
├── dbt_project.yml
Key pieces:
image: python:3.11.1- this defines the virtual image we’re using to run the job'**':- this is used to filter when the pipeline runs. In this case we’re telling it to run on every push event, and you can see at line 12 we're creating a dummy pipeline formain. More information on filtering when a pipeline is run can be found in Bitbucket's documentationscript:- this is how we’re telling the Bitbucket runner to execute the Python script we defined above.
image: python:3.11.1


pipelines:
  branches:
    '**': # this sets a wildcard to run on every branch
      - step:
          name: Lint dbt project
          script:
            - pip install sqlfluff==0.13.1
            - sqlfluff lint models --dialect snowflake --rules L019,L020,L021,L022

    'main': # override if your default branch doesn't run on a branch named "main"
      - step:
          script:
            - python --version
2. Commit and push your changes to make sure everything works
After you finish creating the YAML files, commit and push your code to trigger your pipeline for the first time. If everything goes well, you should see the pipeline in your code platform. When you click into the job you’ll get a log showing that SQLFluff was run. If your code failed linting you’ll get an error in the job with a description of what needs to be fixed. If everything passed the lint check, you’ll see a successful job run.
- GitHub
- GitLab
- Bitbucket
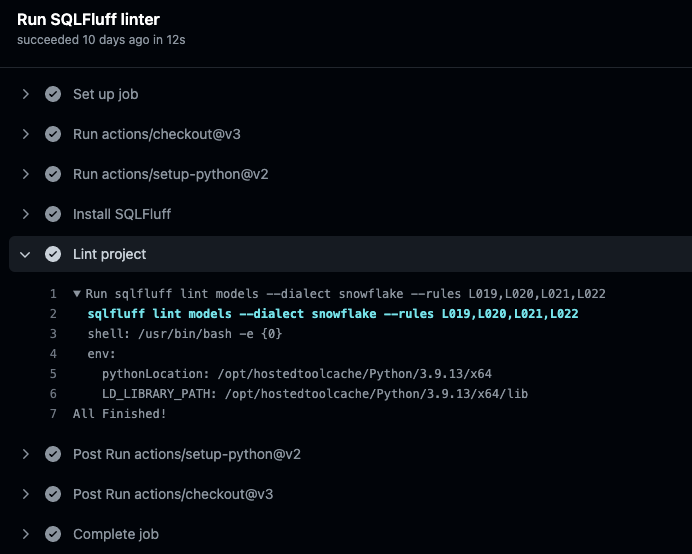
In your repository, click the Actions tab

Sample output from SQLFluff in the Run SQLFluff linter job:
In the menu option go to CI/CD > Pipelines

Sample output from SQLFluff in the Run SQLFluff linter job:

In the left menu pane, click on Pipelines
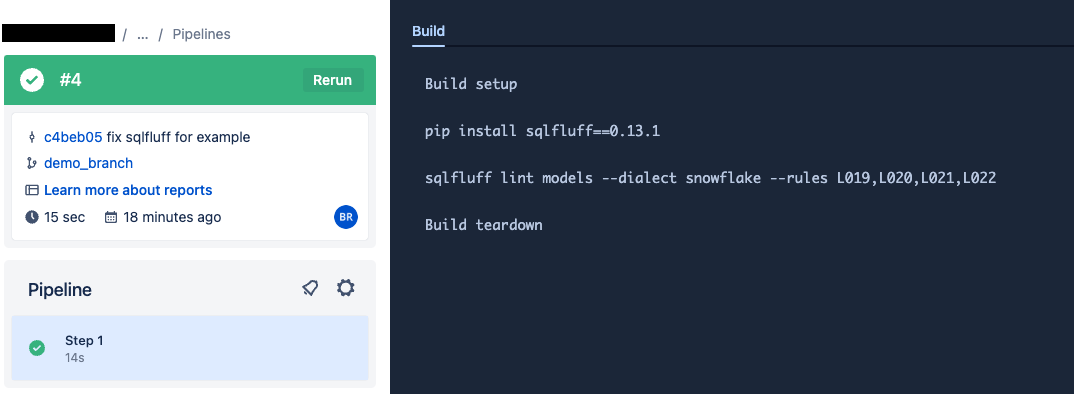
Sample output from SQLFluff in the Run SQLFluff linter job:
